Antihero Buildings

Buildings – All Maps
Thieves’s Guild
Starting building: Doesn’t offer any resources or bonuses. Marks the starting point for your Master Thief each turn, and where all units spawn from when bought. Clicking on your guild will open your upgrade screen as well. If the spawn tile is blocked, then units will spawn to the left and right of the tile. If all three are blocked, units will spawn on the original tile and overlap.
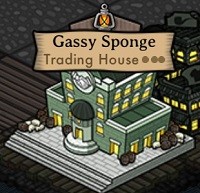
Trading House
1 Urchin: 1 Lantern per turn.
3 Urchins: 2 Lanterns per turn.
Spawns: 3 (1 spawns revealed to each player)
Overview: The only building to generate lanterns. Essential to get going as quickly as possible to deal with anything your opponent or the game can throw at you. In mid to late game, depending on what you’ve gotten from buildings, it might be worth it to fight over the contested trading house or upgrade it to get the extra lantern. If that lantern will get you a crucial upgrade in the next turn or two it can make all the difference. Towards the end of the game, the buildings lose a lot of their value as more upgrades get bought and the only things left are victory points, or situational answers.
Bank
1 Urchin: 1 Gold per turn.
3 Urchins: 3 Gold per turn.
Spawns: 1
Overview: The bank holds the most value for the entirety of the game and is worth contesting over most things. At 3 gold per turn for a full set of urchins, the building pays for itself if uncontested after only a couple of turns. After it’s paid off, it would a net loss of 0 to put an evicted urchin back in. If it gets fully evicted, you’ve either used up your opponents truant, baited out their gang, or at worst it effectively becomes a church in terms of relevance for the rest of the match. Late game, as the maps buildings become depleted, it will help churn out assassins for victory points.
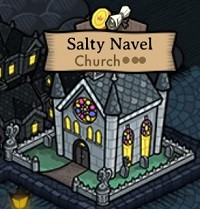
Church
1 Urchin: 1 Gold per turn.
3 Urchins: Victory Point as long as it remains filled.
Spawns: 1-2
Overview: Like the bank, the church generates 1 gold with one urchin. However, the bonus for having 3 urchins is a non-guaranteed victory point, if your urchins get evicted you will lose that victory point. The church is still worth throwing an urchin in for the gold per turn though.
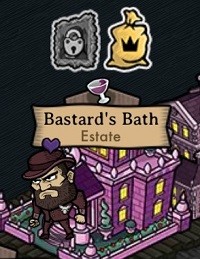
Estate
Masterpiece: 2 Lantern when looted by Master Thief.
Jewels: 4 Gold when looted looted by Master Thief.
Spawns: 2-3 (guards spawn 1-2 turns after the game starts or when the contents respawn)
Overview: Estates are the RNG building of the game, these being dealt to your side of the board can be a bother, but not necessarily a death sentence. Estates contain gold like a normal house, either jewels or a masterpiece, and a guard that needs cleared to burgle it. If you don’t have the unlock for the jewel or masterpiece, you will receive the normal buildings contents. If you happen to scout an estate block on turns 1 or 2 or your opponent just cleared and looted the item, you can try to scout the estate itself to loot it before any guards can respawn.The jewels spawning is more favorable to having masterpieces in them, which will be covered in more detail in the upgrades section. If you’re currently on the back foot for the game, be wary of traps in resource critical estates, and if you can’t afford the safety trap, loot the estate last.
Orphanage
1 Urchin: 1 less gold per urchin bought.
3 Urchins: Your urchins gain the ability to evict 1 urchin from opponent buildings.
Spawns: 1
Overview: A useful, but ultimately situational building. The value of this building varies greatly on what the map deals you. If you have mostly estates and churches on your side, it’s probably not worth rushing. If you’ve got the bank and both trading houses, maybe take it quickly. The second effect is only useful to you if you can maintain the cost yourself, or your opponent is keeping your gang in-check.
Strangefellow Club
1 Urchin: 1 less gold per thug bought.
3 Urchins: Thugs and gangs gain 1 more health as long as it remains filled.
Spawns: 1
Overview: Purely situational building that, unless you plan to pay for 4 or more thugs in the match, this building is only a detriment.
Buildings – Map Specific
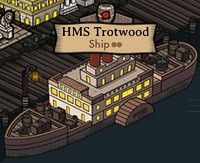
*Ship*
Spawns: The Wharf map, south-east, starting on turn 2.
Functions: Filled with 2 urchins, providing 2 gold or 1 lantern for that turn its filled, and a victory point if it remains filled on the players next turn.
Overview: At 2 urchins to fill, which return 2 gold or a lantern that same turn, this is one of the cheapest possible victory points in the game. While being one of the easiest to take, it’s also one of the easiest to deny, only requiring 1 eviction to stop the victory point. The victory point is permanent as soon as the boat leaves, which can force the opponent to decide to stop an important play you made elsewhere or stopping the boat from leaving.
*Masquerade*
Spawns: Masquerade map, north-east.
Mechanics: Masks spawn in non-unique buildings, and move between turns. Urchins and Thugs can then be sent into the Masquerade using these masks, awarding a victory point once filled.
Overview: The Masquerades victory point is the most expensive point you can go for between all the maps. At face value it costs 4-7 gold for the first point from urchin/thug cost. However, to send in those units, they require masks which spawn randomly. When looting these masks you’re guaranteed to only get 1 gold and the mask, meaning for that action point you’re throwing away a possible lantern or 1 more gold you could have gotten otherwise. This brings up the minimum cost to 8 (1 urchin and 1 thug without owning the buildings), that’s the cost of assassinating a target, that you don’t even have to worry about traps for. For each subsequent heirloom, the cost increases by 4-5 gold. The value of this victory point comes in mid to late game when most buildings have been burgled and you’re only going to be getting 1 gold anyways. Map knowledge is the true value this map has to offer you. As mentioned earlier, the masks only spawn in generic buildings, never main ones. With this knowledge, you can narrow down which buildings in which blocks aren’t main ones. How to utilize this the most will be gone over in individual strategies, but this map has more to offer than its face value would like you to believe.
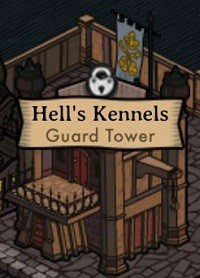
*Guard Tower*
Spawns: The Palace map, 4 towers, 1 in each corner.
Mechanics: Controlling all active towers with thugs allows you to steal the riches in the palace. 1 tower on each player’s side of the map will start active. After the first riches are stolen, 2 random towers will activate. Each theft after that will activate 1 additional tower than the last, up to all 4.
Overview: There isn’t a whole lot to talk about for the guard towers, just be wary of traps, and that thugs still only last for 2 turns when placed inside.
*Palace*
Spawns: The Palace map, center.
Mechanics:Contains 2 (required to win) victory points that are claimed by burgling the building with the master thief whilst controlling all active towers. Always awards 2 action points, even on subsequent thefts.
Overview: The cheapest, and most valuable objective of the map, requiring a minimum of 2 lanterns and 3-4 gold in the form of unlocking and buying a second guard. The real cost of this objective comes from trying to secure the points. At 2 towers and the palace itself, there are many ways to prevent it from being taken. One could trap the buildings, fill the towers with their own buffed guards, block paths, etc. You are required to take this objective at least once, putting it off as the match progresses will make it increasingly easier to be stopped. Because of this, its crucial to take this as soon as possible but safely, so ideal pathing, accounting for npcs possibly blocking your path on your turn, and staying aware of your opponents resources are all key to winning this map.


