A Guide to Valheim Biomes

Biomes
Biomes are general areas in the generation of the map. Being in or near a biome means you’re going to run into the monsters that inhabit it. In order of danger, the major biomes are Meadows, Black Forest, Swamp, Mountain, and Plains. If you are struggling a bit in one, don’t go to the next one.
There is also the generalized minor biome of Ocean once you go out to sea, which is generally as difficult as the Swamp to survive in, but it is possible earlier depending on your luck.
Meadows
New Resources Available: Wood, Stone, Flint, Fine Wood*, Dandelions, Mushrooms, Deer Hide, Leather Scraps, Raw Meat, Feathers
Enemies: Greylings, Necks
General Guide
The Meadows is where your journey will begin and is likely where you’ll want to build a home and hearth. Until you have a bow and leather armor, it is recommended to stay here and not venture too far outside. Experiment with things, learn how to fight, run away, block, all that stuff. Experiment with building, and make sure you have a nice home with a bed and a decent amount of food stockpiled. At that point, take your bow and 200+ wood arrows, and fight the first boss. All this requires is going to the altar and sacrificing 2 deer trophies (not useful for much else up to this point anyway).
After beating the boss, you’ll have the materials to make your very first pickaxe. This will draw you to the Black Forest so you can make good use of it.
Black Forest
New Resources Available: Copper, Tin, Core Wood, Greydwarf Eyes, Surtling Cores, Troll Hide, Thistle.
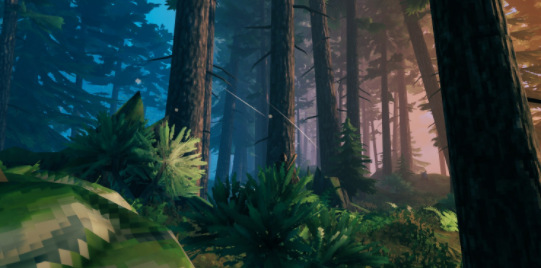
Enemies: Greydwarves, Trolls, Greydwarf Shamans, Greydwarf Brutes, Skeletons.
General Guide
Once you have a pickaxe, you’re ready for the black forest. You’ll also want to get yourself a club and a shield for the dungeons you’ll need to go into, as the enemies there are weak to blunt damage and dungeons are very cramped for using a bow. You’ll need surtling cores to smelt ore and make charcoal, and these are found in said dungeons. They are typically guarded by Skeletons, making them relatively easy to locate. The only other dungeon you may find is a Troll Cave, which is not recommended to go venturing into so early.
Surtlings themselves can be found in the Swamp, so if you can’t find surtling cores in the black forests near you but can find a swamp, this is an option but is not recommended.
Once you have a smelter, and probably a kiln, you’ll be looking for Tin and Copper. Tin can be found on the shore of the black forest and has a distinct look compared to small rocks. Copper is similarly found where rocks would be, but instead, in the place of the huge stones, you may have seen in the meadows. Both can be distinguished visually, but the easiest way to tell is simply by mousing over it and seeing if the name pops up.
Once you’ve exhausted all you feel like making with Tin, Copper, and Bronze, and feel you’re ready, you can move on to the second boss. This one requires 8 ancient seeds to summon and is similar in concept to say, an Ent or what have you. Once again, lots of arrows, good food, do your best. You will receive a Swamp Key from defeating The Elder, as well as his trophy and another power.
Swamp
New Resources Available: Blood Bags, Ooze, Entrails, Ancient Bark, Iron.
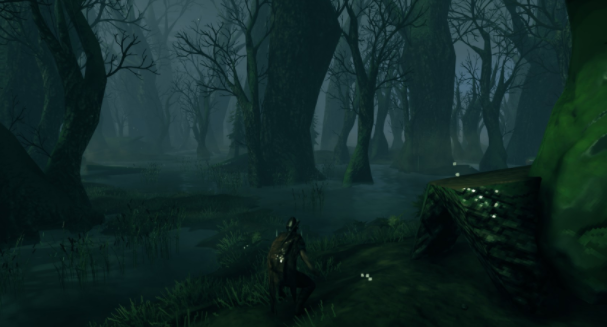
Enemies: Draugrs, Draugr Elites, Skeletons, Blobs, Oozes, Leeches, Surtlings.
General Guide
It is recommended to bring along some Poison Resistance Meads when you go to the swamp but is not necessary. Leeches, Blobs, and Oozers can inflict a poison effect, which short of having rather high health, will typically end up killing you. But if you can avoid letting them hit you at all, you can’t die to it if you never get hit by it.
Making your way through a swamp, you may notice flame geysers. Surtlings gather around these, and killing them drops coal and surtling cores. If they go into the water, and they may do this accidentally sometimes, it will kill them or at least hurt them significantly. Fire damage is ineffective, obviously.
Otherwise, you will mainly be looking to bring along a bronze pickaxe and your swamp key. Look for slanted structures seemingly protruding from the ground, typically with two green torches at the front, guarded by Draugrs, Blobs, or an Oozer. Unlock the entrance with your swamp key, go in, and mine at the muddy scrap piles to find Scrap Iron. It can also be in the stone chests within. Smelt this to get Iron, and you’ll need quite a bit of it to get a full set going. Having a ship or cart nearby is recommended to avoid too much travel time, but be wary it doesn’t get destroyed while you’re mining.
Once you’ve had your fun in the swamps and are ready to move on, you’ll need 8 withered bones, and you’ll have hopefully found the location of the boss. Go there prepared with a poison resistance mead, preferably at least two, and a blunt weapon and shield. Skeletons and slimes are weak to blunt, and he’s both. This boss is one of the easier ones to parry, and the poison resistance will handle his other attacks. Defeat him to obtain the Wishbone and his trophy.
Mountain
New Resources Available: Silver, Wolf Fang, Wolf Pelt, Freeze Gland, Obsidian.

Enemies: Wolf, Fenring, Drake, Stone Golem.
General Guide
Before venturing up onto the mountains, you’ll want to make a decent number of frost resistance meads. One batch (6) should do for a single person easily. You’ll want to go to a decently sized mountain with plenty of areas to explore. If you see drakes, you’re probably on a big enough mountain. You’ll also want to bring enough resources to toss down a small cabin with a bed, campfire, and boxes. A portal is recommended for ease of moving other resources and such.
Similar to all other metals, you’ll want a means to transport your silver back to base, or do so on-site if you prefer. To find silver, you’ll need to equip the wishbone. You’ll know you’ve found a silver vein when it pulses green around you and there is an audio cue as well. The closer you are, the faster it pulses. Once you think you’re about on top of it, dig down. It’s basically a metal detector. Avoid trapping yourself in as Drakes love to spit ice at you when you’re stuck in a hole you dug yourself into.
Follow the usual formula for getting better gear with Silver now, and take a gander at the interesting new options for weapons and armor. The wolf chest piece or cape is recommended first for its frost resistance, enabling you to generally not need the frost resistance meads, however, if you are wet upon entering the mountain biome, you will still freeze even with these equipped, but a mead will prevent this.
Plains
New Resources Available: Lox Pelt, Black Metal, Needle.

Enemies: Fuling, Lox, Deathsquito.
Deathsquitos are especially annoying if you don’t notice them for any reason, as they hit pretty hard and fast, and are hard targets to hit when not coming in for an attack. It is best to kill Deathsquitos well before they notice you avoid having them dodge your arrows.


